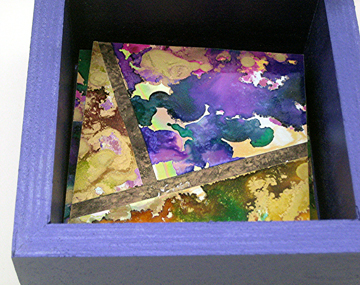
Thursday, November 17, 2011

Stampbord Gift Sets Make Great Stocking Stuffers!

Are you looking for the perfect gift for your crafty friend or even a treat for yourself? Check out the Stampbord Sample Offers and Gift Sets!


From single bags to sets with tools, there is something for everyone!


Order by December 16th for Holiday delivery. 
(US shipments only. For International orders, please order by December 2nd.)

Wednesday, September 21, 2011

ATCs - Stampbord™ and Nature's Print Shop

Check out Judi Kauffman's ATC Triptych titled "A Dream Come True" on page 18 of the CardMaker Magazine special issue, "CardMaker Presents - 37 Popular Techniques for Card Making" (Fall 2011), available at stores starting September 6. It features Stampbord ATCs from Ampersand Art Supply and rubber stamps from Nature's Print Shop.

Monday, September 19, 2011

2011 Stampbord Contest Winners

Thank you to all who participated in the contest!
Our Facebook Stampbord Fans have spoken. Here are the contest winners!

First Place Winner:

Judy Kreitler - wall hanging


Second Place Winner:

Robin Clendenning - card


Four Mini Prize Winners:

Shannon Mccauley-Bielke - Frame

Kimberly Crick - Checkerboard

Vicky Fernando - Book

Alison Hall - ATC

Monday, September 12, 2011

NEW! Stampbord Sample Offers!

Stampbord sample offers are now available through Ampersand's website. 
Click here to see all of these exciting new offers! 

Thursday, September 1, 2011

September/October 2011 Featured How-to by Lisa Bourget


Materials:
• Stampbord™ 5" x 5" Box Kit
• Stampbord™ Scratch Knife
• Scratchbord/Claybord™ Inks - Light Green, Yellow, Sepia
• Hero Arts® Stamp - Manuscript Background
• Magenta Stamps - Architectural Rose
• Ranger - Archival Ink™ - Jet Black
• Tim Holtz® Idea-ology™ Foundations Box Feet
• 7gypsies® - Murano Patterned Paper
• Ranger - Inkssentials™ Cut n' Dry™ Foam
• Ranger - Inkssentials™ Glossy Accents™
• Double Sided Tape or Glue
• Pewter Color Acrylic Paint

1. Using Scratchbord/Claybord™ Inks in Light Green and Yellow, begin sponging on the inks with the Cut n' Dry foam. Apply the inks in a random pattern all over the lid of the Box Kit. Apply the inks to all sides of the lid, box and the inside edges of both. Continue sponging on the inks until desired color is achieved. 

2. Then mix the Light Green and Sepia inks together and lightly sponge around the outer edges of the Box Kit lid and all of the sides and inside edges. Don't use the Sepia ink in the center of the box lid. This should be the lightest part of the lid. This will be stamped on later.

3. Using the Jet Black Archival Ink, stamp the Hero Arts Manuscript Background over the entire box lid. Allow to dry.

4. Next, using the Jet Black Archival ink, stamp the Magenta Architectural Rose in the center of the box lid. Allow to dry.

5. Once the stamped images are dry, begin scratching away parts of the Architectural Rose, using the Stampbord Scratch Knife. Let the stamped image be your guide for scratching away the shaded areas and revealing the white clay surface below. This will add highlights and details to the design.

6. Using the paper of your choice, line the entire inside of the box using double sided tape or glue. Inside top of lid and bottom - Cut two pieces at 4" x 4" and adhere.Box sides - Cut two pieces at 8" x 2". Fold each piece in half and adhere to sides. Lid sides - Cut two pieces at 8" x 3/4". Fold each in half and adhere.

7. Using Ranger's Glossy Accents, adhere four Tim Holtz Idea-ology Foundations metal feet to the bottom of the box. Allow glue to dry. (While glue is drying you can paint the hinges for Step 8.)

8. Install the hinges that are provided with the kit as per the instructions. I have painted these hinges and screws with pewter color acrylic paint. 

Wednesday, June 29, 2011

July/August 2011 Featured How-to by Vickie Kammerer


Materials:
• 1 - Stampbord™ 5" x 5" Box Kit
• Zinsser® Bulls Eye® Shellac
• Modern Options - Rust Antiquing Set
• 3M™ Scotch-Blue™ Painter's Tape
• Natural Beeswax
• Hot Plate
• Teflon Pan
• Butane Torch
• Hake Brush or Natural Bristle Brush
• 2-3 Foam Brushes
• Heat Tool
• Sea Sponge
• Copper Letters
• Glue
• Screwdriver for Box Hinges
(Inspired by Patricia Baldwin Seggebruch's book "Encaustic Workshop: Artistic Techniques for Working with Wax)

1. Using the blue painter's tape, mask the edges of the Stampbord box lid surface and the top of the box base. Using a foam brush, paint the sides of the lid and the base sides with the Iron Surfacer from the Rust Kit. Let dry completely. Then paint a second coat and let dry over night.


2. Using a clean foam brush, paint a coat of the Rust Antiquing Solution over all of the Iron Surfacer painted surfaces. Let this dry and cure and then paint another coat. If you want a uniform shade of rust, paint subsequent coats with the foam brush. If you want a more random rust finish, use a sea sponge and sponge some areas lighter and some areas heavier. Let each coat cure in between. Repeat layers until you are pleased with the finish. Do not seal. Let the box and box lid dry completely over night after before moving onto next step. 


3. Remove all of the masking tape from Stampbord surface. Plug in the hot plate and heat the Teflon pan. Place several pieces of natural beeswax in pan to melt. While the wax is melting, cover the wooden sides of the box lid with painter's tape. Pre-heat the lid's Stampbord surface by running the heat tool over the surface until it is warm. Using the hake brush, paint a single layer of beeswax over the entire box lid surface then fuse (reheating with the heat tool until surface just appears shiny). Allow to cool. 


4. Paint a thick layer of shellac over box lid with a new foam brush. Let dry.


5. Using the butane torch, burn “spots” into the shellac on the box lid. Do this by first placing the flame directly onto the shellac and when it begins to burn the shellac, pull the flame away when the spot is the size and shape you wish. Repeat this over the box lid, moving the torch to where you want a new spot to be, until you are pleased with the pattern. Let the lid set overnight.


6. Spell out the word "trinkets" with copper letters and glue into place on the front of the box lid. Attach the enclosed hinges to complete the box. 

Thursday, April 28, 2011

Enter the Stampbord™ Contest! - PRIZES WORTH UP TO $250.00!

Win awesome prizes from Ampersand™, Ranger®, Jacquard, Elizabeth Craft Designs and Painter’s Pyramid®! All are materials used in the May/June Featured How-to by Judi Kauffman!

There will be one First Place Prize, one Second Place Prize and four Mini Prizes!
The prizes are as follows:


*Due to shipping regulations, Alcohol Inks cannot be shipped by air freight. If an entry outside of the Continental US wins the first or second place prize, they will receive Ranger Adirondack Dye Ink Pads in place of all Ranger Adirondack Alcohol Ink products. 
*Colors of some prizes may vary.
*Click the prize images above for a complete list of prizes.

Complete Stampbord Contest Rules:
Please Read Contest Rules Before Submitting Entries.
  • Deadline for submissions: August 31, 2011. 
  • Entries must be uploaded to the Flickr Group - Stampbord Contest 2011, to be eligible. 
  • You have to join the group to be able to upload photos. 
  • Required with each entry: Your name, short description of the project and materials used - URL (optional). 
  • Limit: Two entries per person. 
  • Limit: One image upload per entry. 
  • Take photos against a solid background so that the subject of the photo will be clear. 
  • Please upload images that are sharp and in focus. 
  • Images requirements: 300 dpi, jpg, RGB. 
  • All entries must be unpublished current work. 
  • All types of media applications are acceptable as long as Stampbord is used.
  • Entries can use any Stampbord product. All formats will be accepted as long as Stampbord is used in the creation of the entry piece. (For example, entries can be individual Stampbord pieces, Boxes, Blocks, Artist Trading Cards, greeting cards, jewelry, magnets, etc.) 
  • All mediums will be accepted - rubber stamping, collage, embossing, metal, mixed media, scrapbooking, etc. 
  • The top six will be put on Stampbord's facebook page for voting September 7-18, 2011. These will be the six winners, but the prizes will be given in order of number of "likes". You must be a fan of Stampbord to be eligible to vote. Join here.
  • Winners will be announced on September 19, 2011 on www.stampbord.blogspot.com and on the Stampbord facebook page. 
  • The six winning entries will be added to the Stampbord.com Idea Gallery. 
  • Winners will be contacted privately, through Flickr, for shipping information for the prizes. Quitting the group before the contest is over may prevent us from contacting you if you have been selected as a winner. 
  • By entering, you are allowing Ampersand to use your artwork for promotional materials. (Artist credit will be given when any artwork is used.) 
  • Questions? Email: info@stampbord.com

May/June 2011 Featured How-to by Judi Kauffman

Faux Mosaic Box & Coasters


Materials:
• 1 - Stampbord™ 5"x5" Box Kit
• 4 - Stampbord™ 3.5"x3.5" Coasters (4-8 will fit in box)
• 1 pack - Elizabeth Craft Designs - Shimmer Sheetz™ - Yellow Iris
• Elizabeth Craft Designs - Be Creative™ Tape
• Ranger - Tim Holtz® Adirondack® Alcohol Inks: Wild Plum, Butterscotch, Lettuce, Pitch Black, Rust, Purple Twilight, Denim
• Ranger - Tim Holtz® Adirondack® Alcohol Inks - Metallic Mixatives: Gold
• Ranger - Tim Holtz® Adirondack® Alcohol Blending Solution
• Ranger - Tim Holtz® Adirondack® Alcohol Ink Applicator
• Painter’s Pyramid® - 16" VersaSpin™ 360
• Jacquard - Lumiere® Light Body Metallic Acrylic: Pearl Violet
• Loew-Cornell™ - Soft Comfort Glaze/Wash Brush #14550
• 4 - Shepherd® Surface Gard® Vinyl Bumpers - 3/4" (non-slip feet for box)
• 4 - Adhesive-Backed Cork 3.5"x3.5" (available at hardware and home supply stores)
• Envirotex Lite® Pour-On High Gloss Finish (optional)
• Craft Knife and Cutting Mat
• Ruler
• Drill
• Small Phillips Screw Driver

1. Choose Lumiere Metallic Acrylic Paint and Shimmer Sheetz in coordinating colors. (Note: One package of Shimmer Sheetz contains enough for one box and eight coasters.) Paint the sides of the lid, the bottom, and interior of the 5"x5" Stampbord Box Kit with Lumiere Light Body Metallic Acrylic. Use the VersaSpin 360 with Painter's Pyramids to hold the pieces while the paint dries.


2. Using the Alcohol Ink Applicator, Alcohol Inks, Metallic Mixatives, and the Alcohol Blending Solution, alter the three 5"x12" pieces of Shimmer Sheetz. Use a different color combination on each sheet. Next, use the Metallic Mixatives and Blending Solution, leaving some of the original Shimmer Sheetz showing on all pieces to visually unify the three.


3. Using the Alcohol Ink Applicator and Gold Metallic Mixatives, color the sides of the coasters. Also Using the applicator, use Alcohol Inks in Pitch Black and Rust to dapple the top of the box and the 3.5"x3.5" Stampbord Coasters. These colors will become the "grout" in the Faux Mosaics.


4. Add the Be Creative Tape to the back of the Shimmer Sheetz pieces. Cut the Shimmer Sheetz up and peel off the tape backing, one piece at a time, to create mosaics on the lid of the box and on all coasters. Trim with the craft knife so the edges are smooth. (Note: Coasters do not need to be identical and do not match the lid of the box. Hint: If using 90-degree angles for all mosaic pieces as shown, repeatedly trim the Shimmer Sheetz with the craft knife and ruler keeping small scraps for other projects.)


5. Add adhesive-backed cork to the back of the coasters. Trim with the craft knife so the edges are smooth. 


6. Attach the hinges, connecting the lid and base. Add non-slip feet to the bottom of the box. Place the coasters inside the box to complete your set! 
(Wipe coasters clean - do not immerse in water.)

Sealing Option: Use Envirotex Lite to seal the coasters and box lid. Let dry according to package instructions. 

Designer's Notes: Give the set as a gift at a bridal shower. Surprise a recent grad setting up her first apartment. If you're hosting the shower, anniversary celebration, or housewarming party, make a coaster for each of the guests to take home as a favor. The box can fly solo, too. It's the perfect size for jewelry and memorabilia.

Hold onto all of the Shimmer Sheetz scraps! They're just right for turning small Stampbord shapes into faux mosaic magnets, frames, pendants, ornaments, Artist Trading Cards and other items. 

Thursday, April 14, 2011

Stay tuned! Stampbord Contest Coming Soon!

Get Your Stampbord Ready! 
Awesome prizes worth up to $250.00 from Ampersand™, Ranger®, Jacquard, Elizabeth Craft Designs
 and Painter's Pyramid® 

Friday, March 4, 2011

Upcoming Stampbord/Stampscapes class at the Cat's Meow in Oakhurst, CA!

Join Robin Clendenning at the Cat's Meow for a Stamp with Stampscapes class. 
Robin will show you how to stamp on Stampbord and use the Stampbord tools to embellish your art! 


Space is Limited! 
Call 559.642.6611 or email catsmeow@sti.net to sign up today!


March 26th
9:30 - 12:00
Class fee - $15.00
http://catsmeowstamps.com/stampscapes.htm


The Cat's Meow
40315 Junction Drive Ste C
Oakhurst, CA  93644
559.642.6611 

Tuesday, March 1, 2011

March/April 2011 Featured How-to by Rachel Bland


Materials:
 1 - 1" x 1" Square Stampbord™
• 1 - Domino Stampbord™
 1 - 1.25" x 2.5" Stampbord™
 Tim Holtz® Distress Ink - Pumice Stone
• Inkssentials™ Glossy Accents™
• Stampin' Up® Classic Stampin' Pad® - Baja Breeze
 Stampin' Up® Classic Stampin' Pad® - Not Quite Navy
• Tsukineko® StazOn® Ink pad - Jet Black
 Tsukineko® - Sponge Dauber
 Stampin' Up® Jumbo Wheel - Very Vintage
 Stampin' Up® Word Stamps - (selection)
 Darkroom Door Butterfly Stamps - (selection)
 We R Memory Keepers™ Crop-A-Dile™ II Big Bite
 1 - Trinity Brass Co.™ Filigree Butterfly - Antique Silver
• 2 - Trinity Brass Co.™ Etched Jumpring 16mm - Antique Silver
 1 - Trinity Brass Co.™ Large Etched Cable Chain 50cm - Antique Silver
 1 - Trinity Brass Co.™ Medium Lobster Clasp - Antique Silver
 3 - 5mm Swarovski® 5328 Xilion Beads - Indicolite
 3 - 4mm Swarovski® 5328 Xilion Beads - Pacific Opal
 2 - 4mm Swarovski® 5328 Xilion Beads - Erinite
 3 - 3mm (SS12) Swarovski - Diamantes Crystal
 3 - 8mm Jumprings Antique Silver
 7 - Headpins Antique Silver
 Flat nose pliers
 Round nose pliers
 Side cutters
 Black Marker
 Dry Brush
 Scrap Paper
 Pin

1.  Begin by arranging the three Stampbord pieces. With the marker, make a mark where the holes need to be to connect the pieces. You will also need a hole in the top two corners in order to attach the chain. Don't worry about the holes being exactly centered, it all adds to the look of the finished piece.


2.  Using the Big Bite on the smallest hole setting, position the Stampbord pieces and punch the hole over the markings. Brush away any debris with a dry brush.


3.  To color the Stampbord pieces, place them on a piece of scrap paper. Color all of them together to ensure you get an even and consistent color. Use the Pumice Stone Ink Pad directly on the Stampbord and cover the whole area with ink. Before the ink dries (you will have a minute or so) use the sponge dauber to blend the ink in a circular motion.


4.  Next, using the sponge dauber, add the Baja Breeze ink. Cover the whole area of all three pieces. Then add some Not Quite Navy ink around the edges of the pieces using the sponge dauber.


5.  Ink up the Jumbo Wheel with Not Quite Navy ink and roll it over all three pieces. Don't worry if it misses some parts, it all adds to the final effect.
  

6.  Using the StazOn ink, stamp some of the butterflies and words onto the pieces. Note that the filigree butterfly will partly cover the bottom right piece. To add more depth, use the StazOn pad directly on the edges of the Stampbord pieces and gently press to transfer a textured linen look to the corners of each one.


7.  Now seal the pieces with the Glossy Accents. Apply directly from the bottle and cover the whole surface to the edges and take care not to flood the punched holes. If any air bubbles appear, pop them with a pin immediately.


8.  Wait a couple of minutes for the Glossy Accents to settle before using tweezers to add a Swarovski Diamante to each piece. Again, take note as to the area that will be covered by the filigree butterfly. Leave pieces to dry overnight on a level surface.


9.  Once the pieces are dry, take the Domino Size Stampbord and position the butterfly in the bottom right corner. Using the flat nose pliers, gently bend the wings to wrap them around the piece. Do this bit by bit and keep trying the fit as you go.


10.  Once you're sure that the fit is right, bend the butterfly around the back of the piece and gently squeeze with pliers to secure. Gently manipulate the other wing to wrap around the other side. Leave the left bottom part of the wing overhanging the Stampbord.


11.  Add some of the Swarovski crystals to headpins, and using the round nose pliers, make a wrapped loop on top of the beads. Use a mixture of single beads and pairs. Using the pliers, twist open the 8mm jumprings and attach the pieces of Stampbord together, adding a crystal before closing. Add a jumpring with some crystals to the bottom part of the overhanging wing.


12.  Cut the chain into two equal lengths and connect the chain to the holes in the top corners of the Stampbord piece using the 16mm jumprings. Add the remaining crystals to the jumpring on the left side before closing it. Attach the clasp to the end of the chain by opening the link and adding the clasp.